DOT Tracking Geofences
On this page
Introduction
A geofence is a virtual perimeter around a real location. In DOT Tracking these are most useful for defining collection and delivery points. Once a geofence is defined, DOT Tracking will automatically create a log when a vehicle enters and leaves that geofence. These records can then be reported on.

One use-case for a geofence may be a delivery point where a vehicle should stay for no longer than 1 hour. DOT Tracking allows you to set a "wait time" on a geofence, and when that passes the vehicle is highlighted for attention.
Creating a Geofence
To access the Geofence administration page:
- Click on 'Settings' on the DOT Tracking main menu
- Click 'Geofences' on the Settings menu down the left side of the screen.
If you have Geofences set up already, this page will display a list of Geofence Categories allowing you to view, edit or remove.
- Click 'New Geofence' on the sub-menu.
This is the New Geofence screen:
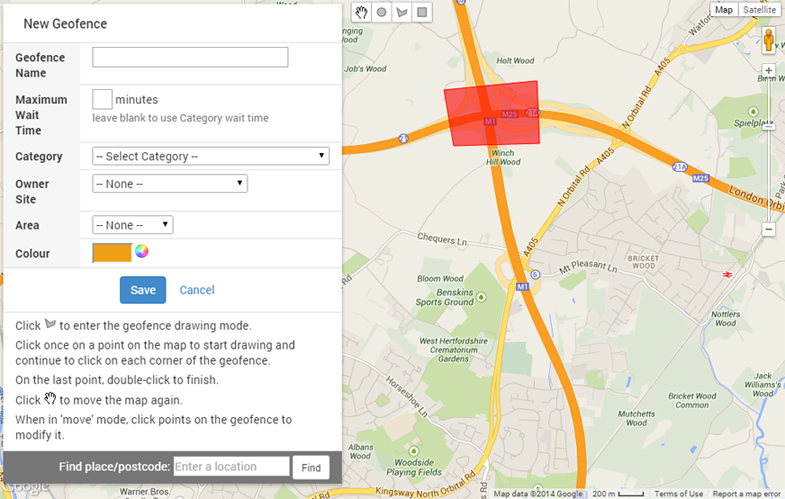
From here you can draw the geofence as well as set the details.
| Field | Description |
|---|---|
| Geofence Name | This is the name you will see displayed in reports and other areas of DOT Tracking |
| Maximum Wait Time | If a vehicle is in the geofence longer than the time entered here it will be highlighted on the Dashboard and on Latest Positions |
| Category | Geofence may be grouped together by categories. This helps with administration and can also be selected on reports |
| Owner Site | Another way to group Geofences, may be filtered in reports by this |
| Area | Another way to group Geofences |
| Colour | Setting a colour for a geofence can help in quickly identifying them, the colours will be shown on events on the Dashboard as well as on maps - see the screenshot above |
In the screenshot above you can see there is an existing geofence in red around the motorway junction. The map here will display any existing geofences to help prevent accidental overlapping or duplication.
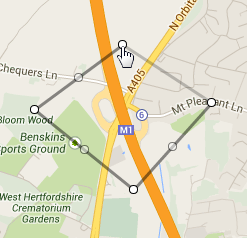
To draw a new Geofence:
- Click
 to enter the geofence drawing mode
 - Click once on a point on the map to start drawing and continue to click on each corner of the geofence
- On the last point, double-click to finish.
See below for an example while drawing:
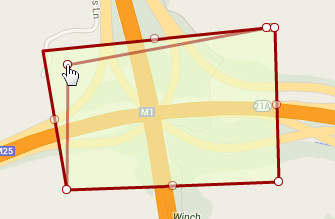
Other options available on the map:
- Click
 to move the map again or to modify existing points.
 - Click
 to draw a circlular geofence. Click where the centre should be and drag the circle to the desired radius.
 - Click
 to draw a square geofence. Click in one corner and drag out to complete the geofence.
Example of modifying an existing geofence:
Reports
Once you have some geofences set up, and vehicles are moving through them, geofence events will be generated. These events can be looked at either through a report or through the Geofence Log utility.
Geofence Log
Access the Geofence administration page again:
- Click on 'Settings' on the DOT Tracking main menu
- Click 'Geofences' on the Settings menu down the left side of the screen.
To view the activity log for a Geofence Category select a Category on the left side and click 'View Log' in the Options:
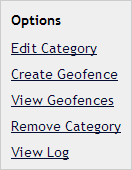
To view the activity log for a specific Geofence, select a Category (or select 'No Category' if none are set up), hover over the desired Geofence and click 'View Log':

The Geofence Log will now be displayed, see an example below:
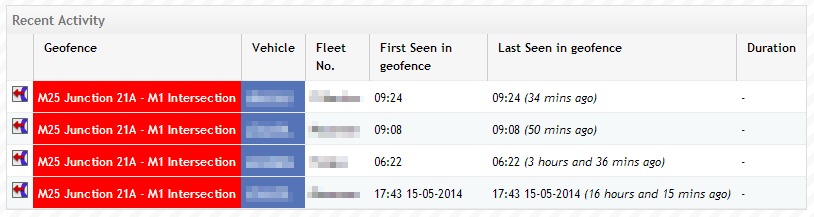
The log shows the most recent events in the geofence or category. The First column identifies the event as an entry  or an exit
  . The Geofence column shows the geofence name, using the colour selected as the background colour of the cell.
Any rows in green indicate that the vehicle is still inside the geofence.
Geofence Hits Report
Access the Geofence Hits Report through the Report option on the Falcon main menu.
There are a number of criteria that you may use to filter the results, you must enter a date range but you can leave the others as their default values.
- Click 'View Report'
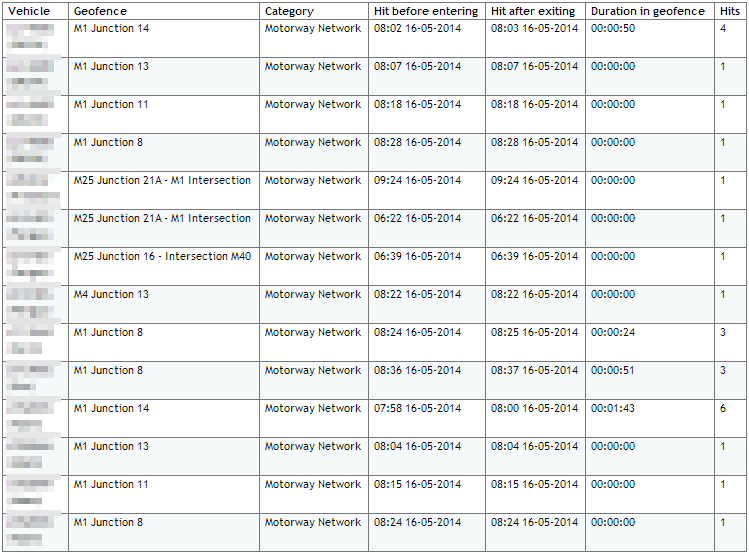
See below for an example of the Goefence Hits Report output: